Dried beans are readily available and fairly cheap at the grocery store, but have you ever just wanted to grow your own?
I do! Because, now I know how they were grown, harvested, and stored. Plus, they don’t take up much room, but do take up a bit of time.
In my gardening zone of 5a, I direct-seed plant in late May and harvest in late September.
My bean of choice to grow is the Navy Pea Bean. Otherwise known as Navy Beans. They are a small, white bean. We love them in Pork ‘n Beans as well as in soups, stews, and Mexican dishes, all of which we make from scratch.
In a 3 foot wide bed, I sowed 150 bean seeds, about 2 inches apart, across two rows about 6 inches apart. I harvested 6 pounds of beans in September.
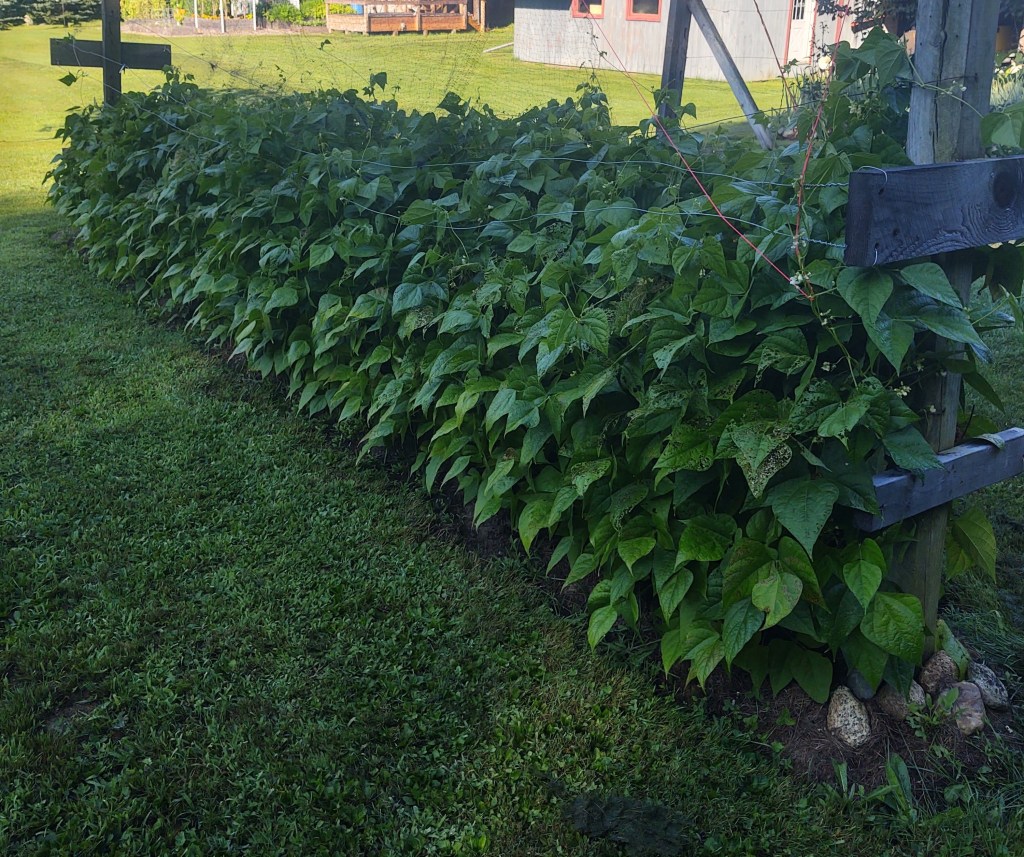
Navy beans are a “half-pole” bean, meaning they do put out a tendril, but those only grow about 4 feet high, as opposed to “pole” beans, which can exceed 7 feet.
They are planted at the same time and using the same method as bush beans; however, they will need a trellis of some type to climb. I am still finding my favorite type of trellis to use. I’ve tried strings and trellis netting, but will be trying cattle panel this year. Stay tuned for the outcome.
The bean plants will also want to have plenty of air movement around them. This will help them dry when the time comes. My Navy Bean bed is out on its own, away from my other beds.
Now, this is where the difference in growing dried beans compared to fresh-eating beans comes in. As the beans form, resist the urge to pick them. They aren’t great fresh eating, although I suppose you could eat them if you were desperate!
The beans will grow, produce tendrils, flower, and produce green bean pods. Then the foliage will turn yellow, then brown, then fall off. The bean pods, meantime, will turn yellow and begin to dry out. Leave them alone!
The bean pods will turn brittle when they are ready to harvest. Don’t wait too long because they will twist themselves open and spill the actual beans all over the ground, making them difficult to pick up.


When they are ready and it’s a dry, sunny day. Pick the bean pods off the plants and place in a paper bag or on a bedsheet or whatever works for you.

A note on weather – We are located in the west central portion of New Hampshire and the days in September can be cold and rainy.
I’ve had years where the pods stay nice and yellow (as shown above) and years where the pods look moldy, but dry – kind of a mottled gray color.
This is all due to the weather and can’t really be helped. I shouldn’t say that…one year I did harvest them just when they started to get mottled and put them in my dehydrator on 110 F for quite a while to help them dry.
You could also bring them in the house and spread them out on a clean bedsheet on the floor and run a dehumidifier and/or a fan to help them finish drying.
Honestly, my go to is to hope for good weather!
I digress.
Time to hull the beans. I’ve seen people stomp on them between two bed sheets, shake up the bag they are in until the beans release, and I’m sure there are many more methods.
I prefer to simply grab three bowls – one for unhulled beans, one for the navy beans inside, and one for the empty hulls, which then go into the compost.
I shell them sitting in my easy chair with a refreshing beverage!
Now, they’re ready for storage until you want to eat or can them. I keep them in vacuum sealed half-gallon mason jars in the pantry.

What I do with them
- Leave dry and soak and cook as needed
- Can them up!
Since it’s just the two of us, I can them in half-pint jars. Because they are low-acid, beans must be pressure canned. Using my stovetop All American 921, I can can (haha) 23 half-pints in one batch. This way, when my husband, John (The White Mountain Sicilian), wants Mexican night or soup night, or whatever, he can just grab, open, and cook!

- Make and can Pork n’ Beans
I found a recipe we like in one of my canning books, modified it a bit (of course) and can up a double recipe which lasts us most of the year.

Bean on and Happy Gardening!!
