Whether your onions are store-bought or home grown, proper curing and storage in the home are crucial to how long they will remain firm and delightfully usable.
For this blog, I’m talking about the 300 onions I started from seed in early March and nurtured through to harvest in early August. They have been stored in the coolest place in my home (under the basement stairs) in plastic totes for the last 7 months. There are 30 of them left and they are still perfectly firm, dry, and yummy!
Why grow your own onions anyway?? It sounds like a lot of work and onions are cheap at the store, right? The simple answer is: I know where my onions came from, how they were grown, how they were harvested, and how they were cured. Besides, a successful harvest makes me happy – like wag my tail happy! Plus, well, onions!!
Once started and planted out, onions are a pretty hands-off crop. Keep them weeded and mulched (if necessary) and that’s about it. If they’re looking sad, some bone meal fertilizer may help.
When the onions mature and the necks begin to close, the greens will fall over about an inch and a half from the bulb. Once the onion has cured, this is generally where you will cut the now brown greens off to them put into storage.
Are they Ready to Harvest?
Each type of onion has a different time to maturity, but the whole patch of one variety will “fall over” at about the same time.
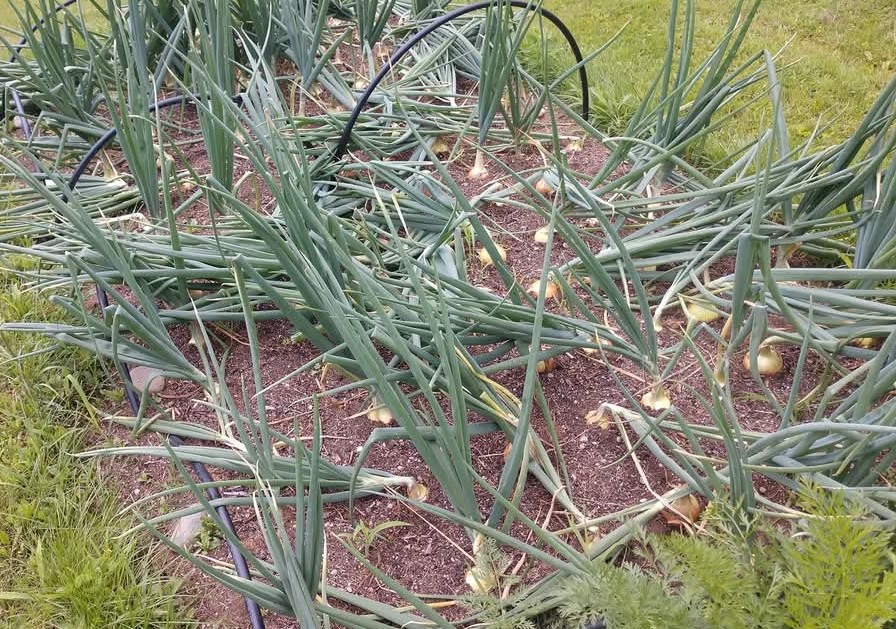
If most, but not all have fallen over, gently bend the stragglers over to match their bed mates.
I generally leave the onions “fallen over” for a week or two, depending on the weather. Do not water the onions during this time as they are forming their protective paper-like skins at this time. Of course, if it rains, it rains – there’s nothing to be done about that! You want to harvest the onions on a dry, sunny day so they can be left in the sun to dry out a bit after harvest and to start the curing process.
Here in New Hampshire, dry sunny days with temps above 55 at night aren’t easy to come by, but we do the best we can.

Harvesting & Curing
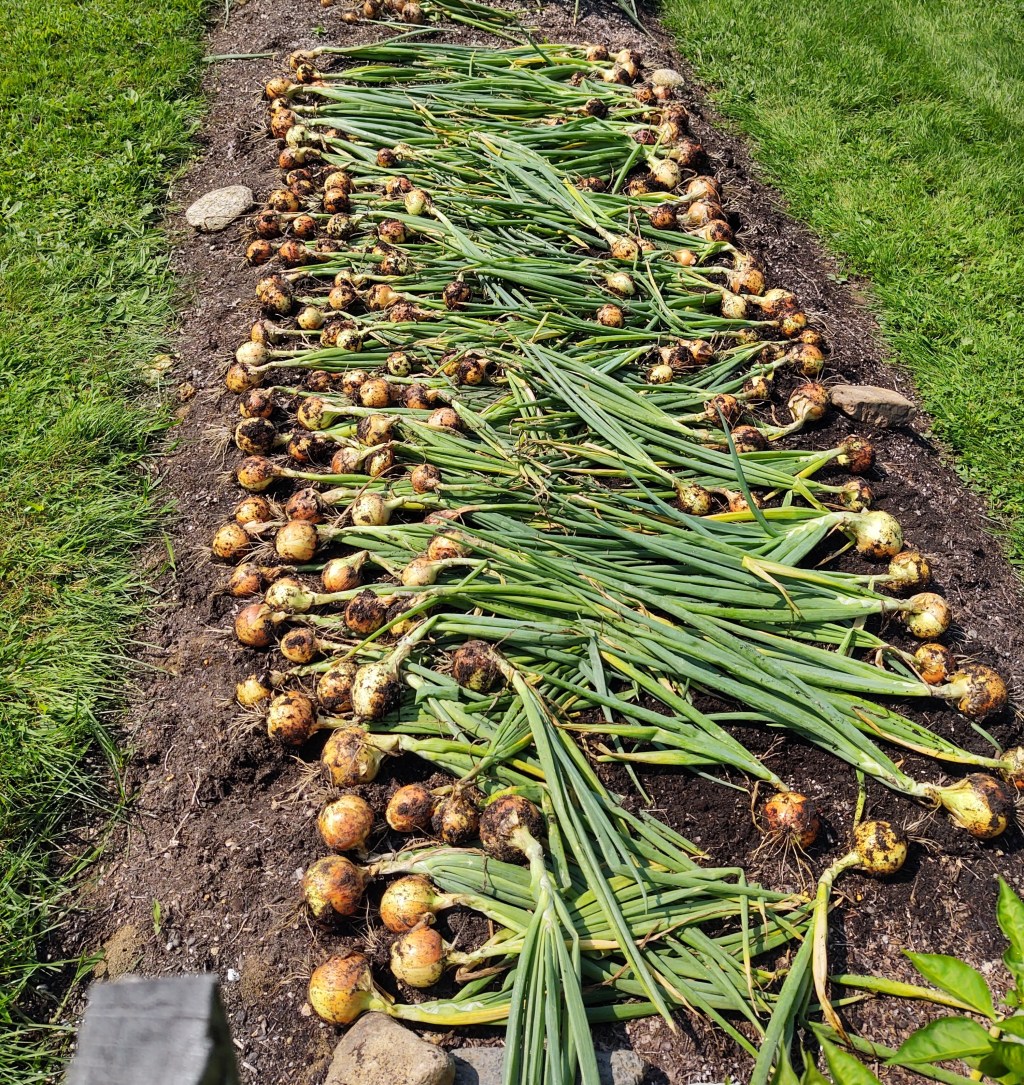
In the morning of harvest day, as soon as the sun dries off the morning dew, pull the onions and lay them out in a single layer right on the soil to begin the curing process. Let them sit in the sun as long as possible. If it’s going to be a warm night, leave them for the next day, but if there is any chance of rain, dew in the morning, or temps below 50, get them under cover for the hanging portion of the program.
Finding a good place to cure onions can be a challenge. Drying works best in a warm, low humidity area with good air movement. That being said, I’ve tried outside in a mesh wagon under the garage overhang and in the shed on screens or hanging through old wire shelving, but the problem has been the humidity in New England and the Northeast. If it’s not about 80% humidity, it’s rainy and cool.
What I did for the first time last year was bring my drying racks inside and hang them in the basement. A dehumidifier was a great help as we do not have air-conditioning to draw moisture out of the air. The dehumidifier was set to 55% humidity and the temps were around 65 F. I kept the room fairly dark. When the dehumidifier runs, it blows quite a bit of air around, helping to cure the onions.

This photo was from the prior year showing drying the onions in my “she shed”. I have since moved these racks into the basement and replaced the ropes with chain to make them easier to raise and lower.
Having gently knocked any remaining soil off each onion BEFORE bringing them into the house, I threaded them into old wire-shelving and oven racks from an old oven. They can be laid on old window screens resting on sawhorses; however with 300 onions, that would take up a lot of space.
It is best to leave the green tops uncut when drying; however, in order to maximize my space, I had to trim some of them a bit. I did this after hanging them so I only cut them enough to not lay on their bunk mates.
Because I had to cut them, they made quite a mess by dripping on the floor (and each other), but this had no effect on how they cured and how they stored.
Curing time varies greatly, depending on all the variables, but they should hang until there is absolutely no green left in the onion tops, the tops are papery and crumbly, and the necks are closed, meaning there is no resistance when they are bent at the same spot on the onion top where they fell over while in the garden. For me, this is generally 3-4 weeks.
At this point, cut each top to within 1 to 1.5 inches from the onion and ensure there is no wetness at all in that cut. If you still see a little moisture, let them hang for another week or so.
Also, remove the wiry root hairs at the same time. They will usually just rub off easily, or they can be cut off. Be sure to not cut into the onion or even into the “root ball button” on the bottom of the onion.
Storing
I store my onions in plastic greenhouse racks or old milk crates, basically something that will allow the onions to breathe, but not fall out of the box. You can also use mesh “onion bags” and hang them in your storage area.

Store in a cool, dark place (55-65 F) – NOT in the fridge – with low humidity. By the time I get into winter, the humidity in my basement is below 30%.
Because I don’t have a root cellar or unlimited fridge space, I store everything under the basement steps. Each in its own container. This means potatoes, onions, garlic, butternut squash, and pumpkins are all in residence at the same time.
Onions, for me, are a topic I could talk about for hours. There are many other things that go into growing your own onions and many different ways to do what I’ve described above, but this is my method, tweaked yearly over the last 10 years and what works best for me.
Happy Gardening!!